Zebracat makes it incredibly easy to turn your audio recordings into dynamic videos. With the Audio to Video feature, all you need is an audio file—Zebracat will automatically generate matching visuals, captions, and a full video experience that brings your words to life.
Visit studio.zebracat.ai and sign up or log in to your account.
After logging in, you’ll land on the homepage. On the left-hand panel, click the purple “+ Create Video” button.

You’re now in the Story tab, where you set up your content settings.
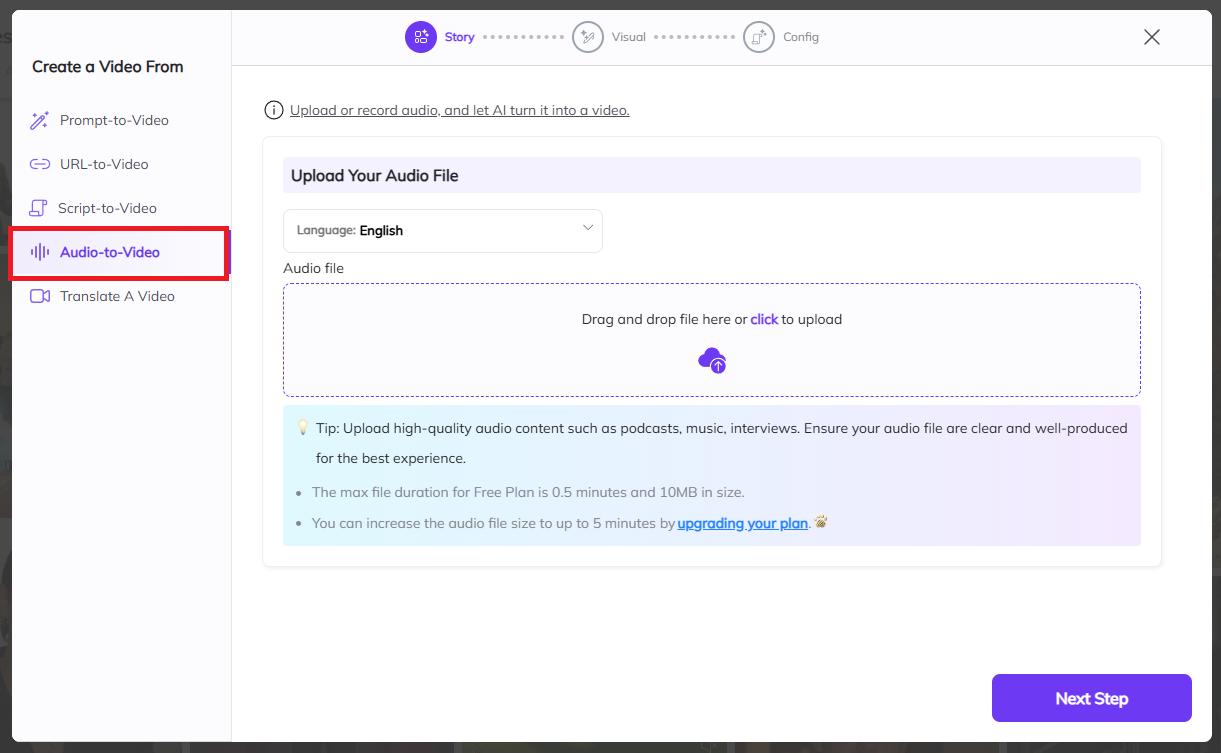
On the left-hand panel, click Audio Input under the "Create a Video From" section. This tells Zebracat that your source content is an audio file.
1. Upload Your Audio
You’ll see a designated upload box.
You can either:
Click to upload an audio file from your device, or
Drag and drop your file into the upload area.
Hit the Transcribe button
Supported formats include .mp3, .wav, .m4a, aac, aiff, alac, flac, ogg, opus, wma, amr, mka
After clicking the Transcribe button, you’ll see a text box labeled as “Text of Uploaded Audio”, displaying the transcription of your audio file.
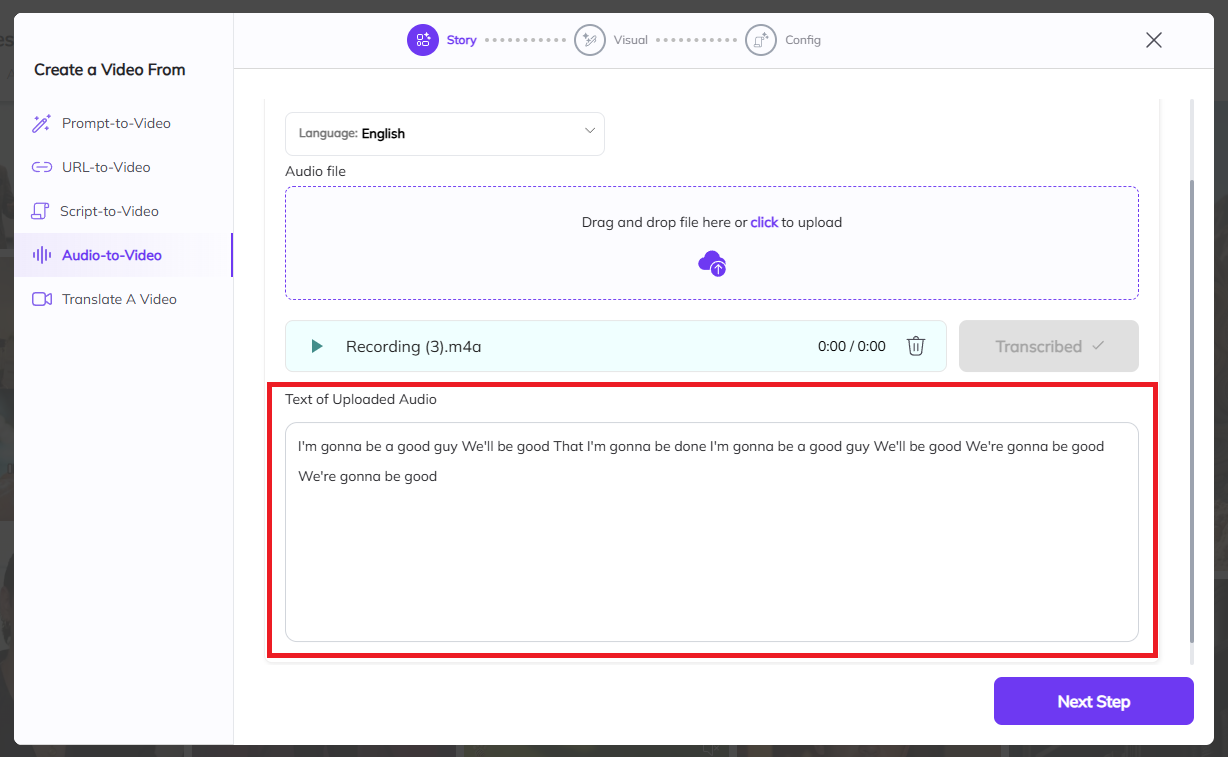
Note: Your audio file must contain clear spoken voice for Zebracat to extract and generate text. Music-only, silent, files that are too short, or longer than 30 seconds won’t work.
Once you are satisfied, click the purple “Next Step” button
Now, the remaining steps will look just like the other workflows—prompt to video, script to video, and URL to video.
Once you click “Create Video”, you’ll enter the Visual step of the flow.
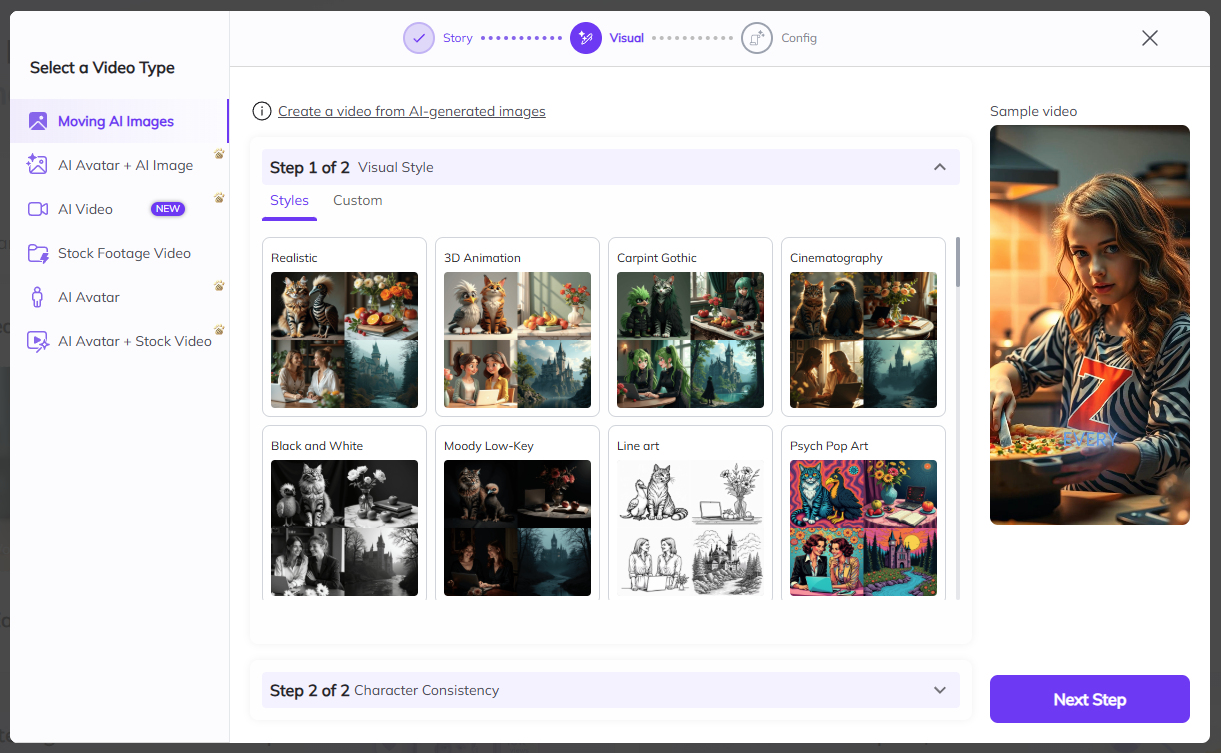
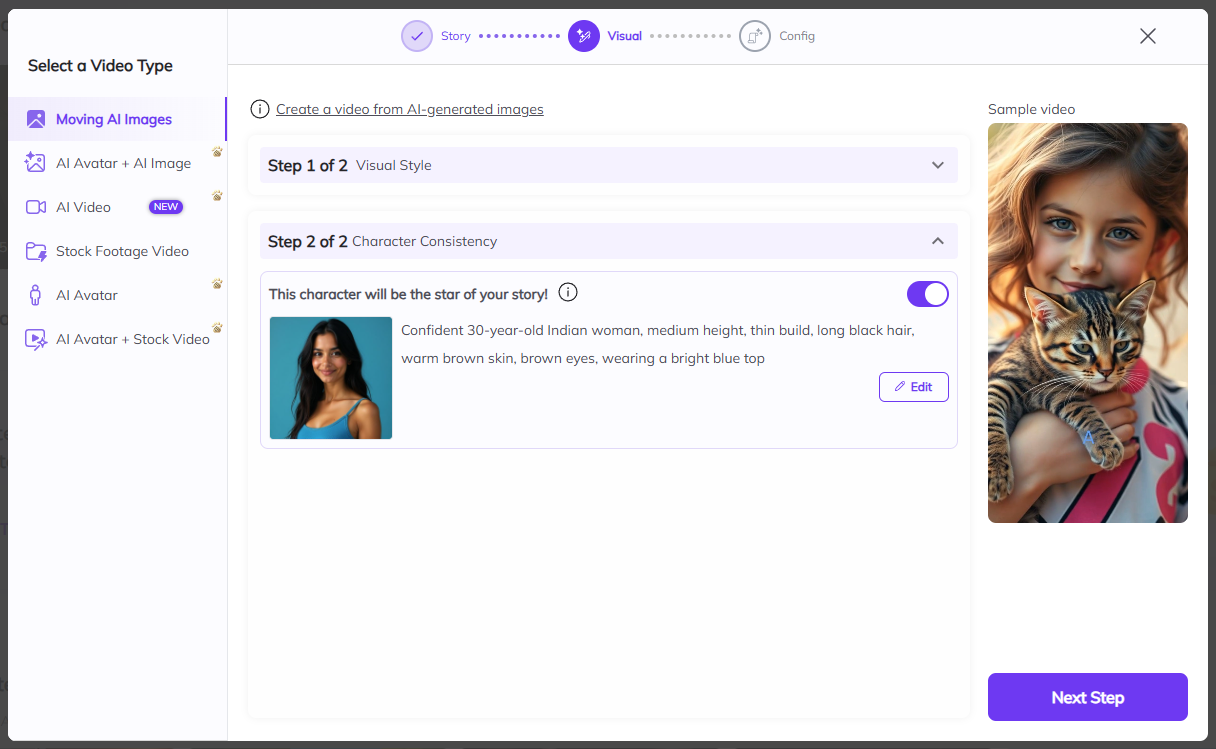
On the left-hand panel, you’ll see the section labeled “Select a Video Type.”
(This is where you choose the structure and media type for your video.)
You’ll have six options to choose from:
Moving AI Images (AI visuals with motion)
AI Avatar + AI Image (avatar narration over AI-generated background)
AI Video (New) (fully generated scenes based on prompt)
Stock Footage Video (use high-quality stock clips)
AI Avatar (just the avatar on screen with narration)
AI Avatar + Stock Video (avatar layered over stock clips)
Click the video type that best fits your vision.
For example, if you want AI visuals, select “Moving AI Images”.
After selecting your video type, you’ll be prompted to choose a visual style on the right. This helps guide how your video will look—options include Realistic, 3D Animation, Carpint Gothic, Cinematography, etc. Once you've chosen your style, click the purple “Next Step”
When you click “Next Step,” you’ll see the Character Consistency section. This step is optional — you can choose to design an AI character for your video, let Zebracat create one for you, or skip it entirely.
Suggested by AI
This is an intelligent recommendation based on your prompt or theme.
You’ll see a description (e.g., “A sophisticated woman with short blonde hair and striking blue eyes”) alongside a visual preview.
Click on the suggestion to apply it as your character.
Create Character
Want a custom character that fully matches your story?
Click the “Edit” tab.
Fill in the fields:
Character Name: Choose a descriptive name to identify the character.
Character Description: Describe how you want the character to look. Example: “A girl with red curly hair, tall, blue eyes, wearing a green jacket.”
You can edit and regenerate until you're happy, then apply it to your story.

 Tip: Toggle the “Character Consistency” switch ON (top-right corner of this section) to make sure the same character is used across all scenes. This keeps your video visually coherent and professionally aligned.
Once you've chosen your style, click the purple “Next Step” button in the bottom right corner to proceed to the Configuration tab.
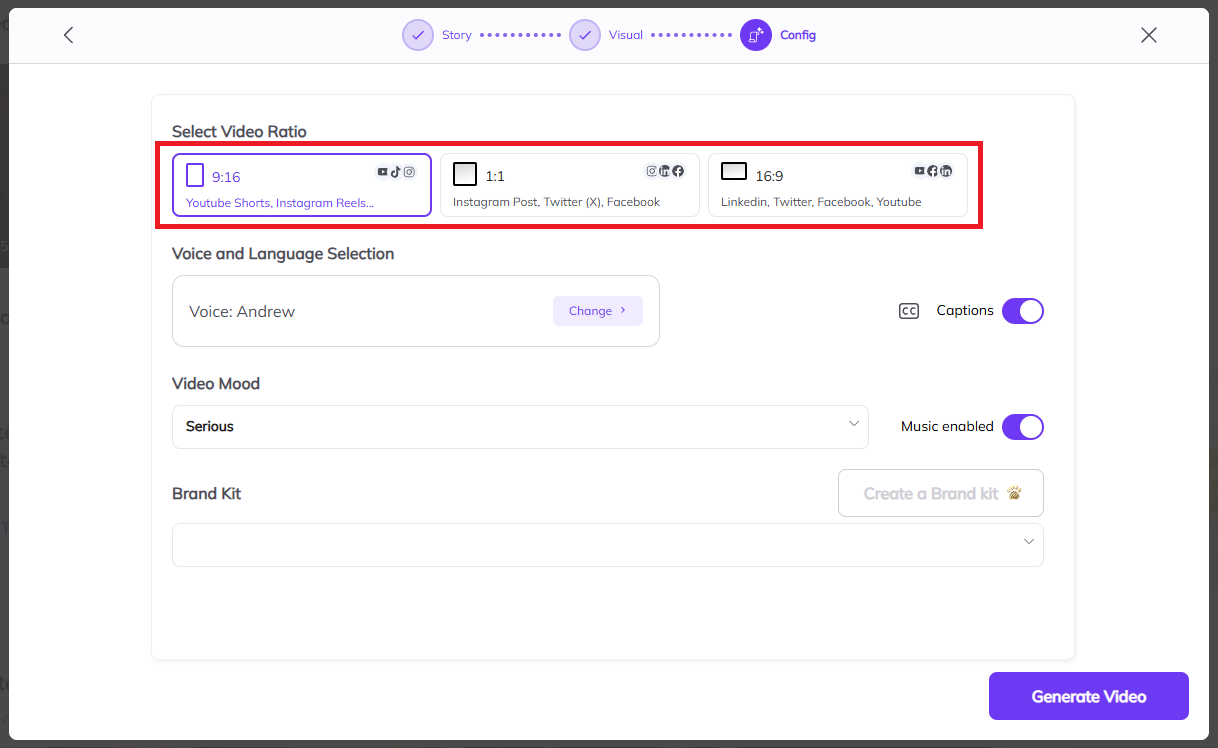
In the Configuration tab, under “Select Video Ratio”, pick the format that matches your publishing platform:
9:16 – Best for TikTok, Reels, and Shorts
1:1 – Great for Instagram Posts and Twitter/X
16:9 – Ideal for YouTube, LinkedIn, or Facebook
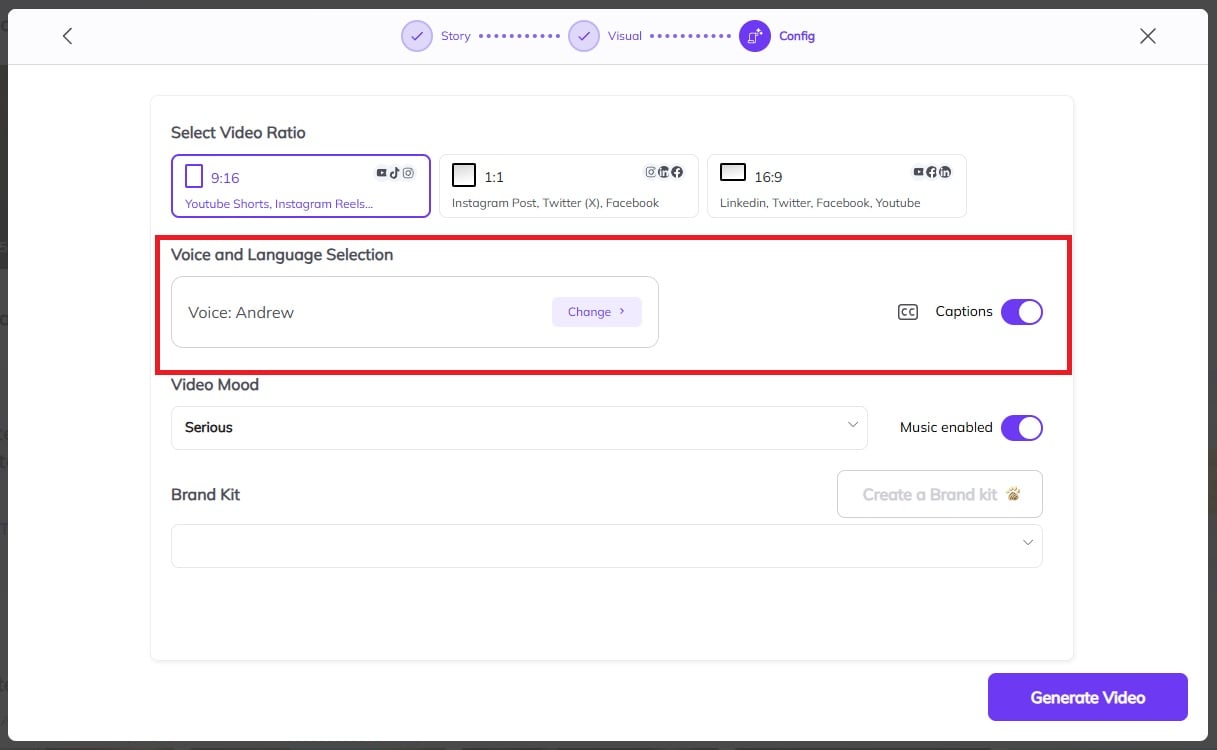
In the “Language – Caption” section:
You’ll see the current voice listed (e.g., Voice: Antoni).
Click the “Change” button to open the full list of available AI voices (male and female, different tones).
You can also toggle Captions ON or OFF depending on your preference.
This helps make your video accessible to viewers watching without sound.
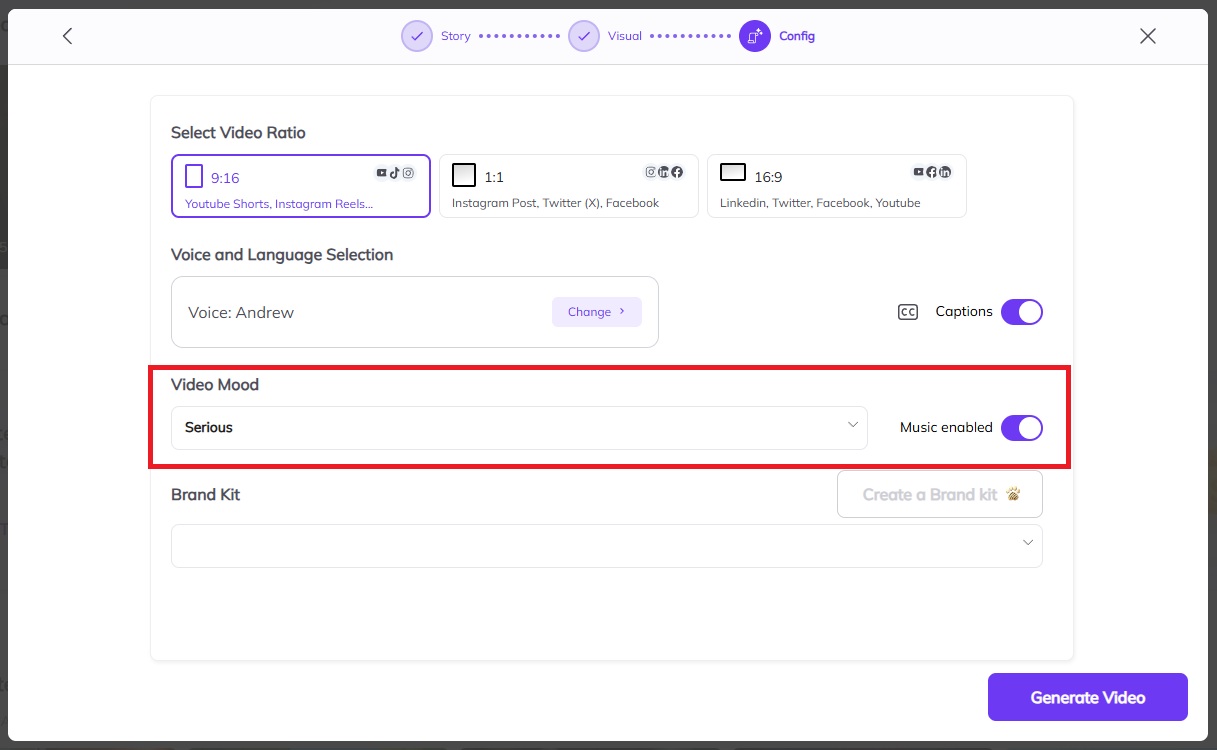
Under the “Video Mood” section, select a tone that matches your message:
Options include Energetic, Happy, Serious, Suspenseful, etc.
The music will be auto-matched to the selected mood, but you can always change it later in the editor.
At the bottom of the Config page, you’ll find the Brand Kit section.
If you’ve uploaded your logo, fonts, or brand colors earlier, select your brand kit from the dropdown.
If not, click “Create a Brand Kit” to upload your branding assets and save them for future videos.
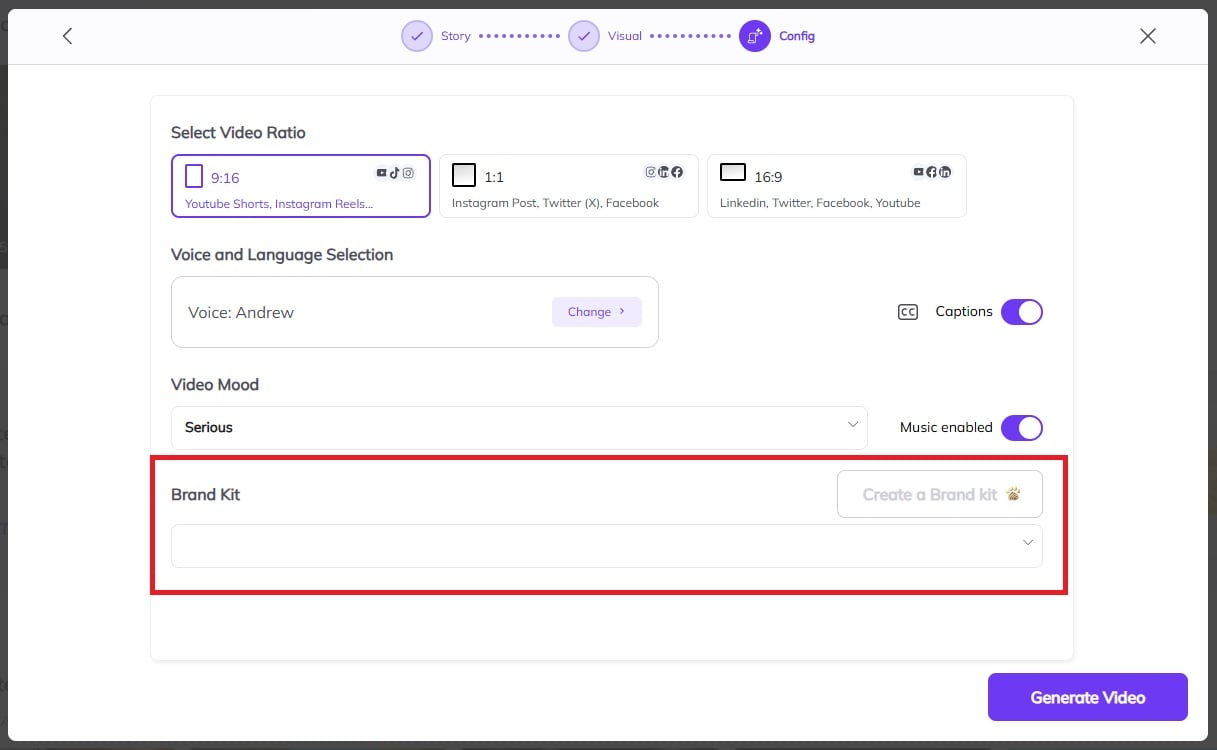
Once your script looks perfect, click the purple “Generate Video” button.
Zebracat will now automatically create your video in seconds:
Your script will be narrated by the selected AI voice.
Scenes will be matched using AI visuals or stock clips, depending on your earlier selection.
Background music and captions will be applied based on your mood settings.
After the video is generated, you’ll be taken to the Editor, where you can make additional customizations like trimming scenes, adjusting visuals, or editing captions.